Just got three new Opteka speed grids off ebay today, can't wait to try them out. I've been checking out their stuff on ebay for open box returns and such and got a real great price on them $8.95 a piece.
I purchased one each of the 1/8th, 1/6th and 1/4th grids. I already have a 1/8th. These things are great for getting a nice tight light on your subject and for the price you can't beat them. They use a velcro attachment to attach to your speedlights that with a little fiddling works pretty well. I'll show you how I attach mine in a later post. If you've got the money head over to ebay and do a search for Opteka and check out their open box stuff. You can usually get it for a good price and usually their stuff is pretty decent.
Monday, December 30, 2013
Tuesday, December 24, 2013
Brooks Grades and Christmas
The semester is over and the grades are in! I received two A's an A- and a B. Not to shabby. Need to do a little more work on my Art History. Looking forward to starting next semester already.
Also wanted to say to the folks that follow this blog: Merry Christmas and Happy New Year. Have fun, be safe.
Also wanted to say to the folks that follow this blog: Merry Christmas and Happy New Year. Have fun, be safe.
Thursday, December 12, 2013
Brooks Institute Update and Other Things...
The first semester is over. There was quite a bit of writing in this semester and I'm expecting more writing in the next. I'm now on a four week break and I don't know what I'm going to do with myself. I do have some images to post from this semester and will be putting those up in the next couple of days.
I'll be putting together a little lighting talk at the Lompoc Photographers Guild on the 15th of January. I'm so looking forward to it. It should be a lot of fun. It has to be an hour long, I'm going to shoot for about a 45 minute talk and demo with 15 minutes for questions. This hardly ever works out because people always want to know about lighting.
I'll be putting together a little lighting talk at the Lompoc Photographers Guild on the 15th of January. I'm so looking forward to it. It should be a lot of fun. It has to be an hour long, I'm going to shoot for about a 45 minute talk and demo with 15 minutes for questions. This hardly ever works out because people always want to know about lighting.
Saturday, November 30, 2013
I have never done so much writing in my life as I have for this first semester of my MFA program. I know it's only going to get more involved. I'm actually looking forward to it. I've noticed that as I've been writing about art and creativity my own creative processes have changed and I think for the better.
Monday, November 18, 2013
How lignt can interact in an image.
Chris, our Photographic Theory instructor gave us a shooting assignment. We have to create five different images exploring the ways light can interact in an image. Here are my five:
| Transmission |
 | |
| Reflection |
 | |
| Refraction |
 | |
| Absorption |
 | |
| Scatter |
Sunday, November 3, 2013
Time Changes Suck
The switch from Daylight Savings time to standard time has me a bit screwed up right now. My clock says 4:02 AM but my body is telling me it's 5:00 AM so I'm up. Figured I'd post what we did in class yesterday. Our Photo Theory class with Chris Broughton was interesting. We started covering color processes and color film. He gave us an interesting assignment. We have to photograph how light works. should be an interesting assignment. In Studio Critique class with Tim Bradley we took a look at our "Shoot how the camera sees" Photos. Everyone had excellent photos. Wish I could post them all so you could see them. There was a wide variety of things. Some of them beautiful and some disturbing but all of them were fantastic. Here are a few of the ones that I did.
.JPG)
.JPG)
.JPG)
.JPG)
.JPG)
.JPG)
.JPG)
.JPG)
.JPG)
.JPG)
Monday, October 28, 2013
Cyanotypes
As promised I have my cyanotype from class scanned. I was testing the paper as I was using inkjet matte paper and we weren't sure if it was going to work so we tried a couple of different papers on one exposure. The image is a photogram of a plant that is outside my apartment here in Lompoc. It has a red flower that looks like fiber optic strands coming out of it. I think both parts of the image came out rather well. I'm planning on making a digital negative and trying that next time I do this. If your interested there is plenty of information on the web for doing this and it's so easy I'm going to teach my seven year old how to do it.


Interesting assignments for this session. I have to photograph how the camera sees and for the one after I have to shoot perfect because of the flaw. It will be interesting to see what I can come up with. We did cyanotypes in one of my classes I'll post the one that I did as soon as I get my scanner unpacked.
Tuesday, October 8, 2013
One of my assignments this week was to write a letter to the editor explaining why photography is art. I had to use a picture of mine to defend what I put in the letter. Here is the picture that I used.


This image was taken on September 10, 2013 using my Nikon D3s with a 14mm lens. I did not crop the image but I did some dodging and burning mostly in the kelp, the foot prints and the waves.
Tuesday, October 1, 2013
Living In California
We've been here for almost a complete month. It took us three weeks to find an apartment. We've moved into a place in Lompoc which is a little under an hour drive from Santa Barbara. Lompoc has two claims to fame the federal penitentiary and Vandenberg AFB.
Vandenberg is kind of cool in that they launch rockets for NASA and other countries and companies space agencies. This past weekend they launched the Falcon 9 rocket from SpaceX. It went off at 9:00am and shook the hell out of the windows. My 7 year old and her friend were absolutely thrilled with it. Unfortunately no pictures from me. If I had known it was taking off I would have found a good vantage point and snapped a few. There is another launch scheduled in December. I'm going to try and get shots of that one if I don't have school.
Speeking of school, our instructors in the Brooks MFA program are no slouches when it comes to assigning reading homework. I've probably read over a hundred pages over the last three weeks for class and still have several more that I have to read for this weekend. It has been a little difficult though to find time to get my homework done while at the same time get settled into our apartment. I will be working very late on Wednesday and Friday trying to get my stuff finished up. I have two images that I have to get done and a couple of pages to write. I also have to draw a sketch for an image that will be due next class period after this weekend.
I will try to post the images that I'm working on here after they are graded with explanations of what the images are for and how they were shot and processed.
Well it's back to work for me. Until next time.
Monday, September 16, 2013
First week at Brooks
First week went rather well. I have a ton of reading to do for next week. Classes are set for every other weekend, eight hours on Saturday and another eight on Sunday.
Monday, August 26, 2013
Moving Day
We'll be shipping out on the 30th for California. The yard sales are over everything is getting packed and ready to go into the trailer. I'll be packing up my computer in the next couple of days and wanted to get this last post in before we leave.
It's supposed to be hot and miserable the next couple of days which isn't going to make it easy getting our stuff organized and loaded. All the equipment is packed and ready to go except for a couple of cameras that I'm going to use on the trip. I'm taking an old Yashica 635 camera, A Zeiss Ikon Nettar 515/16 folding camera, an Olympus Pen EE-3 half frame, an Argus C4, a Horizon 202s Panorama camera and of course my Nikon D3s. I'm going to load Black and White film in all of the film cameras for the trip and develop it after school gets going. Hoping to get some good shots, we'll have to see how it goes.
We're hoping to get to California on the 2nd of September and find an apartment or house to rent right away. I have orientation on the 5th and 6th and classes start on the 7th and 8th. Those are going to be four very long days after the trip. I won't be posting until we get everything set up in California but I plan on posting quite a bit when we get settled in.
I'm very excited to be starting this new chapter in our lives with my wife and youngest child. It will be a great adventure and I, for one, am looking forward to it.
Take care everyone and I'll be back to posting in a couple of weeks.
Robert Gainor
Friday, August 16, 2013
Bike Rides and the Nikon D40X
Recently I started riding my bike again and as one who likes to have a camera with me and not wanting to put my big expensive pro camera at risk, I decided to strap on my old Nikon D40x.
The D40x is a 10 megapixel consumer model that is about a third the size of my D3s. It doesn't have a front finger wheel to change adjustments and the colors tend to be just a bit saturated. The shutter mechanics are also very different than the D3s. It's almost like there is just a bit of a delay from the time you push the button to the time the shutter fires. Another problem is, when in manual mode you have to change the aperture by pressing a button that is in the most awkward place and then move the thumb wheel. (I usually put it in shutter or aperture priority depending on what I'm shooting because of this). It also has no internal motor so most of my lenses have to be used in manual focus, which is not a big problem for me because I tend to manually focus most shots anyway.
All that being said I've had a blast shooting with this thing. especially while going down the trail as fast as my feet can peddle and firing off a shot at a slower than normal shutter speed. I've also tried some narrow depth of field stuff. I've even shot some to convert to black and white with great results.
Here are some of my results:


I've put more pics up on flickr and will be posting more.
Here are some of my results:


I've put more pics up on flickr and will be posting more.
Knowing your camera and it's limitations can help you get some great shots regardless of any perceived shortcomings it may have. I try to turn those shortcomings into opportunities to be creative.
Here is the link to my flickr account to check out some more of my stuff:
Tuesday, August 13, 2013
Brooks Institute MFA Program
I was recently accepted into the Masters of Fine Arts for Photography at the Brooks Institute in Santa Barbara, CA. For the next couple of weeks I'll be packing up and heading out to California so I won't be posting much here at all after the 26th. I plan on taking some old film cameras in the car with me and plan on shooting the whole trip. I'll be posting some of that here after I get to California.
I'm looking forward to getting there and working with the faculty and other students at Brooks. I also plan on posting a lot on this blog as a record of my time there.
I'm looking forward to getting there and working with the faculty and other students at Brooks. I also plan on posting a lot on this blog as a record of my time there.
Thursday, August 1, 2013
August Quick Tip Shutter Speed
This months Quick tip is on hand holding and shutter speed. Most people push the limit on the slowest speed they use. If your subject is not moving or if you're shooting with flash it's not that much of a problem, but if you're shooting in low light with a lot of movement you're better off opening up your aperture and cranking up your ISO a bit to compensate and set your shutter speed an leave it alone.
If you're hand holding your slowest speed should be 1 over the focal length of your lens or 1/60th of a second, which ever is faster. So if you're shooting with a 300mm lens then your slowest shutter speed should be 1/300th of a second. You can push this a little as long as you have a stable holding technique.
1/60th is the slowest I'll go unless I'm doing something special or I'm purposely trying to get some motion blur and when that's the case I'm going a lot slower than 1/60th.
So for this quick tip, if you're in low light situations use shutter priority or manual and set your shutter to the lowest speed for hand holding and adjust your exposure with aperture and ISO.
Monday, July 29, 2013
Auto vs Manual
Cameras and lenses these days come with all kinds of advantages for the average photographer. I can set up my camera to all auto, put on a flash and give it to my wife and she could get some good pictures where the subjects are properly exposed and for snapshots they would be great... But as professional photographers we need to get the most out of our cameras and one way to do this is to shoot manually. Now I'm not saying that I don't use auto sometimes, but I shoot in manual mode more often than not. I learned how to shoot manually when I shot film and have carried it over to digital.
It's not that hard it just takes practice, but once you get into the habit you'll be amazed at how fast you can be shooting manually. For one thing you'll be able to focus on what you want instead of the camera choosing. An example of this would be if your shooting a sporting event and your trying to get one player, but another player is in between you and your target player, the camera likes to focus on the closest thing. Well guess what, it's going to focus on the other player and your subject is out of focus. Another reason would be if you have a scene where the exposure is all over the place and you have several dark places and light places of different values. The camera is going to try to set that at an exposure that will average the whole thing but you only want a very bright portion exposed properly and you don't care about the rest. Setting the exposure manually can help you get that one part exposed properly.
Shooting manually gives you a level of control that auto won't. I'm not saying you won't get great pictures on auto, but if you want to really step up your photography shoot in manual modes and really control your camera, instead of letting your camera control you.
Thursday, July 25, 2013
Depth of Field
I've finished the depth of field article complete with images and before anyone complains about the color and focus, this was done very quickly to show the concepts of depth of field. I wanted to get this up quickly and I will be changing the photos as soon as I get some time to create better examples. I hope you find the article helpful.
Here's the link:
http://robertgainor.blogspot.com/p/depth-of-field.html
Here's the link:
http://robertgainor.blogspot.com/p/depth-of-field.html
Tuesday, July 23, 2013
Depth of Field Article
I have the depth of field article written, I'm just waiting for the weather to cooperate so I can get some good example images. It's supposed to be clear tomorrow so I plan on going out and getting the shots I need. Sorry it's taking so long.
Sunday, July 21, 2013
Lighting Workshop Aftermath
We survived!!!
It was a great workshop and everyone learned something. I think one unfortunate thing was the weather didn't cooperate with us to well but we persevered in spite of it.
I know we covered a whole range of topics and hopefully we answered everyone's questions but there were some questions on depth of field that I'll be covering here in a future post. I'll be shooting some examples over the next couple of days to help with the explanation. Hopefully this will clear up some of the confusion that I saw at the workshop.
I will also be getting a list of my equipment to everyone and where I bought it and how much I paid for it. Just remember that some of the speedlights that I use are very old and SHOULD NOT BE PUT DIRECTLY ON YOUR CAMERA. I use them mainly with radio triggers and off camera.
I'd really like to thank Melissa and Tyler for helping out. They were really helpful during the breaks discussing some of the information and answering questions for people. I'd also like to thank my wife Louise for putting up with me while we put this workshop together. I hope everyone had a great time and I hope you plan on attending our next workshop which we will be covering creative lighting. Look here and on Facebook for times and place.
Saturday, July 20, 2013
Lighting Workshop
The day has finally arrived. We've got everything together and will be setting up soon. The apartment smells great with pumpkin spice muffins and chocolate cupcakes that Louise, my wife, made. I'm looking forward to meeting everyone and having a great time. We'll be posting photos tomorrow when it's all done. I'd like to thank everyone who helped put this together it was a lot of hard work.
Just to let everyone know we've started planning our next workshop already, which we're looking to put on in a few weeks.
Tuesday, July 16, 2013
Lighting Workshop
Wow! I never thought that it would take as long as it did but we finally have the lighting workshop lesson plan done. The Power Point is also finished. One last thing to get finished is setting up the layout for the class.
We have a bunch of equipment that we want to show everyone and we also have a few techniques to demonstrate. I think this is going to be a fun class and I'm sure everyone will learn something. So those of you that are coming this Saturday be sure to bring your cameras. If you have a flash or light meter bring that as well.
Looking forward to seeing everyone there on Saturday.
www.robertgainorphotography.com/lighting-workshop
Friday, July 12, 2013
Lighting Workshop
One more week to go! Can't wait. We've got two models lined up, one girl I've worked with before and another that I've been wanting to photograph for a while. We have all of our goodie packages together and are getting the equipment ready. We still have quite a few openings so if you want to come you can register at www.robertgainorphotography.com/lighting-workshop. We'd love to have you.
Thursday, July 4, 2013
Ebay Purchases
Well I purchased some equipment on ebay and am waiting for all of it to get here.
One Item already arrived: Professional 80cm Octagon Umbrella Speedlite Softbox Reflector (80cm is a little over 30 inches). It cost me $25 with free shipping and I was pleasantly surprised at the quality. It took less than 5 minutes to set up and it put out some pretty decent light. Now it's no Westcott Apollo with the rip-stop nylon and it only has one zipper opening unlike the four zipper opening of the Apollo but it's fairly deep, and you can use it with the diffusion panel taken completely off to give it some virsatility.
http://opteka.com/osc18.aspx
One Item already arrived: Professional 80cm Octagon Umbrella Speedlite Softbox Reflector (80cm is a little over 30 inches). It cost me $25 with free shipping and I was pleasantly surprised at the quality. It took less than 5 minutes to set up and it put out some pretty decent light. Now it's no Westcott Apollo with the rip-stop nylon and it only has one zipper opening unlike the four zipper opening of the Apollo but it's fairly deep, and you can use it with the diffusion panel taken completely off to give it some virsatility.
Another thing I purchased and I can't wait to get it is the Opteka OSC18 1/8" Universal Honeycomb Speed Grid for External Flash. They also have a 1/4 inch grid as well. This one cost me $8.95 and is an "Open Box" but Opteka stated in the description that "All open box items carry a
standard return policy and will include a full manufacturer's warranty". From the reviews that I've read there are some minor issues with mounting the product, most of them state that adding another velcro strap or rubber band fixes the problem. Not so bad considering that the Honl Grids cost anywhere from $25.00 to $30.00 plus shipping. I'm really looking forward to getting this item. I love honeycomb spot grids. I have a full set for my Alien Bees and have been wanting one to put on my speedlites for a while. If this thing works out I'm probably going to purchase another one. I like to use them on my background lights with different color gels to get some really nice effects. I'll write up a full review of this after I test it out.
The third thing I purchased was a Ravelli ABS Background Stand, Again another open box item from Assiamounts out of Phoenix, AZ. My winning bid was $62.00 and at that price it also comes with two Prism backdrops, one white, one black. I admit I was really looking for extra light stands but at that price I just couldn't pass this up especially when Amazon has this kit for $152.00. It also comes with a guarantee against defects. I should be able to use the supports as light stands if I want as well. Again I'll review this once I get it and check it out.
Here are the links the manufacture's or seller's web sites so you can check this stuff out. As with all things you purchase on ebay, make sure you can return it for defects, check on customer reviews (I found most of this stuff reviewed on Youtube), and try to get it for the lowest price you can.
4th of July
Well I was going to go out tonight and shoot pics of fireworks but as luck would have it, it's pouring out, So no firework photos this year but if you want to know the best way to take firework shots read on.
First thing you need is a tripod. Next get yourself a cable release or remote. As for the type of lens I've used various lenses but find that a wide angle lens works well if your close to where they're firing them off and a longer lens if you're further away. I set the shutter speed to bulb and the aperture I set it to the widest opening to start with and gradually close it down depending on my exposure. You then need to figure out where the fireworks are going to be going off and point your camera in that general direction. When you see them fire one off before it explodes open the shutter. Keep it open as long as you want to get the colors, for multiple fireworks keep it open longer and for single fireworks keep it open shorter times. Don't be afraid to experiment with it.
First thing you need is a tripod. Next get yourself a cable release or remote. As for the type of lens I've used various lenses but find that a wide angle lens works well if your close to where they're firing them off and a longer lens if you're further away. I set the shutter speed to bulb and the aperture I set it to the widest opening to start with and gradually close it down depending on my exposure. You then need to figure out where the fireworks are going to be going off and point your camera in that general direction. When you see them fire one off before it explodes open the shutter. Keep it open as long as you want to get the colors, for multiple fireworks keep it open longer and for single fireworks keep it open shorter times. Don't be afraid to experiment with it.
Tuesday, July 2, 2013
Thrift Store Find (Olympus FL-40)
Went to a thrift store yesterday here in the area that offers a 25% discount on Mondays. They always have a few camera bags behind the counter and I went up and had them pull them down so I could see what was in them. One bag had an off brand 35mm film camera with two lenses and a small flash with no bounce. Tried to open the battery compartment and it was full of leaky batteries. That one was a definite no. The next one had an old Canon AE1 with two third party lenses and a small Sears flash. They wanted $40.00, with the 25% discount that would have put it at $30.00. Still too high so no. Last bag was $12.99, so it came in at $9.75. It had an old Olympus 2.5 megapixel digital camera with an Olympus FL-40 flash. I took a chance and bought it without testing it out. and $9.75 no great loss if it didn't work. Fortunately when I got it home and tested out the flash it worked fine. Score!
I went online and did some research and found that it's a pretty decent flash, It has a Guide Number of 40 and it's adjustable in 1/4 power steps. The head rotates 360 degrees and bounce of 90 degrees. It has a tele and wide setting. The GN of 40 is at the tele setting. The only thing I don't like about it is it doesn't hold the last settings when it's turned off, so I'll have to keep an eye on that when I'm using it. There is one on ebay for over $40.00 right now with 2 bids on it. Amazon has them for over $110. You can check it out here:
I know this flash isn't that powerful but it will come in handy for all sorts of things. Oh and I gave the camera to my 7 year old who loves it. Two Velcro strips later and this thing's in the bag ready for use. As always with used older flashes this thing will never see the hotshoe on any of my cameras but with remotes it'll work just fine.
You never know what you're going to find at the thrift stores. Just make sure that you don't overpay and check everything for battery leaks. If you're unsure and you have a smart phone you can always look something up online before you buy. You can even take in your own batteries to check stuff out. I try to carry 4 AA batteries just for that purpose, I just forgot to put them in my pocket yesterday. I have several flashes that I bought from thrift stores for very little money, some of them I use quite a bit for product type shots, Others work great for on location portrait shoots. Never underestimate those older flashes. Even the ones that can't be adjusted. You can do a lot with them using gels and gobos.
Monday, July 1, 2013
July Quick Tip: Super Clamps
My quick tip for July is really not a tip but some equipment advice. I've been playing around with some different lighting setups and found one piece of equipment invaluable, the Super Clamp. They're manufactured by several different companies but all of them operate about the same. Here's a link to Manfotto's version at Adorama: http://www.adorama.com/BG2900.html. The price for one of these is anywhere from $17 up to $50. I was lucky and found mine at a surplus store for $5 a piece (I bought three of them and would have bought more if I had more money) but mine are white instead of black but, mine also came with spring clamps that attach to the stud.
These things are so versatile it's unbelievable. I took one and turned two light stands into a boom stand. Now I wouldn't attach a heavy mono light to it but a small speed light did just fine. I also use them with my 6ft diffusion panel. I put two of them on a light stand and attach two speed lights to it then clamp the diffusion panel to another light stand and I have a nice diffused strip light. Need to hold a bounce card in a difficult spot? With a spring clamp on one of these super clamps your good to go.
There is an unlimited amount of accessories that you can purchase to use with these things as well but you can do so much with just a clamp and a stud.
Next to gaffer tape these things are a must in your bag.
Saturday, June 29, 2013
Getting Ready for The Lighting Workshop
It was a busy day today getting ready for the Lighting Workshop we're having on the 20th of July. We're polishing up our Power Point presentation and getting our goodie folders together. Spent some of the day testing out the equipment making sure that it's all operational. We have two models lined up for the workshop and both of them are great fun to work with. We should have a lot of fun. I'm really looking forward to putting this on.
Wednesday, June 26, 2013
Playing Around With Light
Here is is the "Peppers" picture and the lighting diagram for the images. The only difference from the Bread and Peppers to the Tuning Forks is I used a diffused back-lit background with a gridded light and a gelled speedlight and a gridded Main light. The tuning forks were also placed on a piece of quarter inch glass raised up from the table about 8 inches so light would fill in from underneath.


Thursday, June 20, 2013
Playing Around With Light
With the Lighting Workshop coming up I thought it would be good to practice some lighting techniques so I pulled out my lights last night and some stuff that I had sitting around and set up a shoot in my kitchen. I've been wanting to do this for a couple of months now and I finally made some time to do it. I didn't get done til about 3:30 this morning and fell asleep on the couch.
I woke up at around 9:00 am and put everything away. I really need to get a studio setup where I can just leave it all up.
Here are two of the finished shots, "Bread" and "Tuning Forks".


I also shot some "Peppers" and a weird child toy called a squish which is wooden tubes and balls held together with strings. I'll post these later as well as the lighting diagrams.
Thursday, June 13, 2013
Lighting Workshop Update
I've been working on the lesson plan for the lighting workshop next month and am getting really excited about putting it on. I'm looking forward to getting together with other photographers and talking about my favorite subject... Lighting. I can't wait to exchange ideas and techniques to help everyone get the best out of their lighting and improve their photography. It should be a fun time.
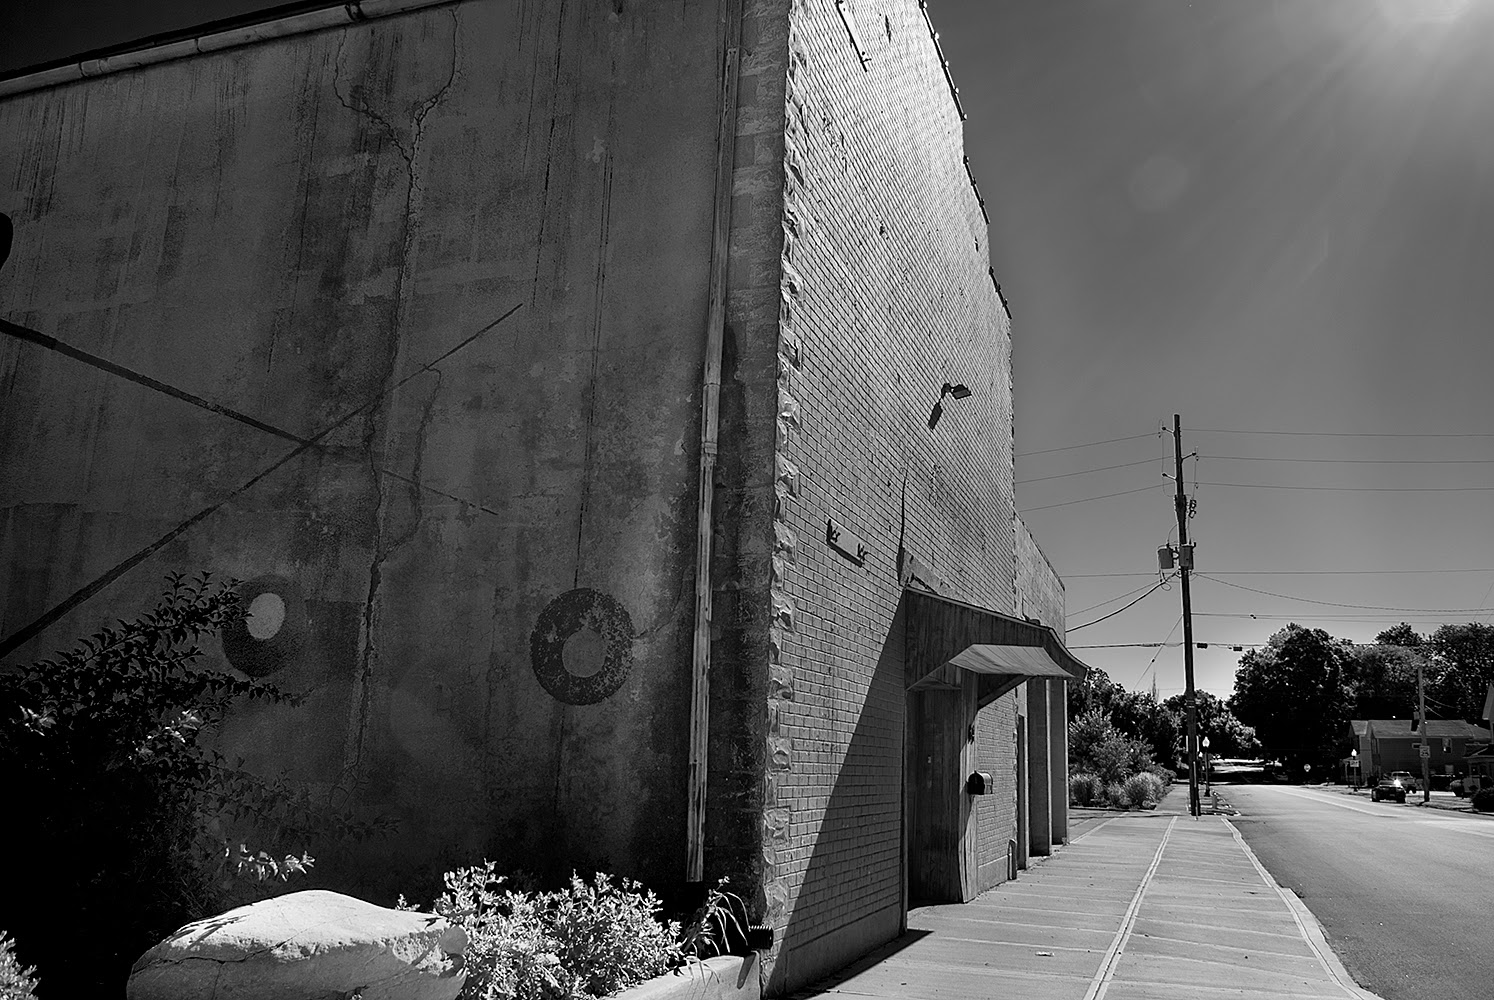
Sunny 16 Rule
Here are some of the images that I shot the other day using the Sunny 16 Rule, All shots were taken at ISO 200 @ 1/200th @ f/16.


Remember you don't have to stay at 1/200 @ f/16, you can adjust your exposure. So if you wanted to shoot at a faster shutter speed all you have to do is open your aperture for an equivalent exposure. So if you wanted say 1/400 of a second you'd have to open your aperture to f/8. I just kept it on 1/200th @ f/16 just to see what I could get at a single shutter speed and aperture. Another thing that you might try is to bracket your exposures a stop open and a stop closed to help ensure that you get a good exposure. A good exposure is not unnecessarily a proper one. For instance the building in the first image above, I would have liked to see one a stop open to open up the shadows in the building a little bit.
Just a small note: none of these images were processed. these are straight out of the camera to show you the results you might expect using this rule.
Wednesday, June 12, 2013
Sunny 16 Rule
Went for a walk yesterday and took one of my Nikon D90 Cameras with me. I put my 50mm 1.8 AF D lens on it and set it up for ISO 200 with a shutter speed of 1/200 @ f/16. I did this to test out the Sunny 16 rule. I totally disregarded what my meter was saying and just went by feel When I hit a bit of shade I opened up a couple of stops. I took an initial look at the images and they look pretty decent. I'll post a few of them once I have some time to really look at them and do some processing to them.
For those of you who don't know what the Sunny 16 Rule is it states that your exposure on a Sunny day is 1/ISO @ f/16. So if your ISO is set to 200 your shutter speed will be 1/200 @ f/16. You can compensate for shade and cloudy weather by opening up a stop, for darker clouds or shade open up 2 stops. Give it a try sometime you'd be surprised at how well it works.
For those of you who don't know what the Sunny 16 Rule is it states that your exposure on a Sunny day is 1/ISO @ f/16. So if your ISO is set to 200 your shutter speed will be 1/200 @ f/16. You can compensate for shade and cloudy weather by opening up a stop, for darker clouds or shade open up 2 stops. Give it a try sometime you'd be surprised at how well it works.
Saturday, June 8, 2013
Lighting Workshop
Are you...
An experienced Photographer looking to
refresh your lighting skills?
An intermediate Photographer looking to
step up your game?
A photographer who has your camera
skills down but would like to step up to the next level and learn
about lighting?
But...
Can't afford those expensive all day
lighting workshops?
Don't know where to start?
Start Here...
Phone: (937) 768-9848 or Email: robertgainor@hotmail.com with any questions.
Cost of the Workshop is $50.00 (split into $20.00 registration fee and $30.00 due at the door).
We'll be covering the following Topics:
- Ambient Exposure
- Flash Exposure
- Exposure Balancing
- Indoor / Outdoor
- Fill Flash
- Inverse Square Law (and how to use it to your advantage)
- Using modifiers
- Umbrellas
- Softboxes
- Diffusion Panels
- The 5 in 1 Reflector
- Bounce Cards
- Gobos
- Grids
- Gels
- Lighting Setups
- Single Light Setup
- Two Light Setup
- More Lights
- Creative Lighting
- Light placement
- Intensity
- Bringing In Some of the Ambient Light
- Adding Motion to Your Images
- Equipment
- Getting the best out of what you have
- Inexpensive alternatives to get you started
Busy Week
This has been a very busy week. I've been editing pictures from Jonathan and Anna's wedding, and working on another project that's been taking up a great deal of time. Hoping to post more in the next coming week.
Saturday, June 1, 2013
June Quick Tip: Splitting the Difference
This month's quick tip covers dealing with different lighting in the same image and you don't have a flash to balance the exposures. For example: your out shooting in the woods and you see a flower in the shade but you want to frame it with trees and use the sky as a backdrop. You have the exposure at the flower and the exposure of the sky. One thing you can do is get the exposure of the sky then get the exposure of the flower. Now split the difference between the two. You'll be slightly under exposed on the sky and slightly over exposed for the flower.
The quickest way to do this is set your camera meter to spot, point it at the flower and zero out your meter. You then point it at the sky and zero it out but make sure you count the number of stops as you change them. You can then go back the other way but you will only go half the way. For example you zero out the flower then you count as you zero out the sky. Say there are 6 stops between them. You would then adjust back 3 stops frame your shot then shoot. The example I used here is not the greatest photo but it demonstrates the technique rather well. The photos are of some stuff in my bedroom window and the pillows on my bed with the window for the background. I did not do any post production on the images. The first shot is exposed for the inside stuff. The second for outside and the third is exposed in between the two. I know you can use an HDR Program to get a good image but if you don't have access to one this technique will work in a pinch.
All images were shot at ISO 1250 and an aperture of f/16.
 | |
| Shutter Speed of 1/40 |
 | ||
| Shutter Speed of 1/1250 |
 | |
| Shutter Speed of 1/320 |
The difference between the exposure here is very extreme, almost 6 stops difference between the two areas and I lost some details on the jars and the darker colored items, but the closer the difference the better your results will be. From here you can fine tune your exposure as well to get a better balance between the two.
Thursday, May 30, 2013
Processing Images
I've been processing images for the last three weeks and have not been able to get out and shoot that much. I have to finish images from a wedding that I shot three weeks ago. We shot the rehearsal and all day at the wedding so there are a large number of images to get done. Hoping to have all of it done and up at my website in less than two weeks. I have a large number of the candids and the shots from the rehearsal already done, I just had to wait for the bride and groom to pick the formals and other images that they wanted. We sat down with them the other day and finished with that.
I try to get my processing down to twenty minutes or less per image, especially candid shots. This part can eat up so much time which is why it is extremely important to get it as good as you can in camera to save yourself time on the back end. I find that spending a few minutes extra getting the shot in camera can save me tons of time on the computer. Another tip to help is bracket your shots by 1/2 a stop each way to make sure you get a good exposure. On group shots take at least three, sometimes four on larger groups. You never know when your going to have to grab a face from one of the other shots to make it work.
Another thing I have to keep reminding myself is to get up from the computer at least once every two hours. You've got to rest your eyes. If you don't you can make serious color correcting mistakes.
Tuesday, May 21, 2013
Location Scouting
Went out location scouting with a friend of mine last Sunday. We went out looking for different types of locations to shoot seniors, wedding, and other things. One thing I plan on doing over the next couple of months because of that trip is get together a list of locations with photos and keep a catalog of locations to shoot at. It will make things a whole lot easier when I'm talking to people about what type of photos they want and what type of locations they're wanting.
Wednesday, May 15, 2013
C17 at the Air Force Museum
Had a little fun today shooting at the Air Force Museum. They put a C17 out in the air park a while ago and I finally had some time to go out and shoot it. I had my 28-105 zoom lens, my 50mm Series E lens, and my 14mm Sigma lens. I was out there between 12:30 and 1:30. It was a clear day and I wanted the shadow to fall on the underside of the plane with highlights on the upper portion. I shot one panorama with my 50mm and one shot with the 14mm from the same angle. I had to move closer with the 14mm to get that wide angle distorted perspective look. I also used the 50mm to get a detail of the back part of one of the engines. I converted that shot to black and white because I liked the contrast in the image.
 | |
| Panorama with the 50mm |
The panorama shot is a series of 6 images taken with my 50mm in portrait mode (long part of frame running from top to bottom instead of left to right). I used photomerge in Photoshop CS5 to merge the images.
 | |
| 14mm Lens |
I was trying to get close to the same perspective as the panorama. I tried about 3 different angles and this one came out the best.
 | |
| Rear of the Engine. |
I took a series of shots of the engine at different aperture settings to try and get different depths of field. I shot at f/1.8, f/5.6, and f/11. I liked this one which was taken at f/5.6, The engine in background has just enough blur while the foreground engine is sharp all the way through.
Today's shoot was a great example of using that 12:00 high sunshine to your advantage. I got great shadows below the plane to give it shape and excellent high lights on the top to separate the plane from the sky. I did have to be careful about blowing those highlights but I think the overall lighting on the plane worked out quite well.
Saturday, May 11, 2013
Flash and Ambient Exposure
I was going through some images the other day that a photographer had taken outside using a flash on a cloudy day, and noticed a huge problem with them. There was no definition in the sky. The sky looks totally white. I took a look at the meta data and found that the shooter used an aperture of f/4 and a shutter speed of 1/60th to 1/100th of a second. Looking at them I couldn't help but wonder why the photographer forgot one important fact about flash photography. He forgot that when you use flash there are two exposures to take into account. The flash exposure and the ambient exposure. He could have stopped down on the shutter speed to bring those clouds in or even stopped down the aperture and increased the flash power or the ISO (set at 100). Given the camera that he was using he could have gone all the way down to 1/200th of a second on that shutter speed. Another thing I noticed was he was using a flash on a bracket and the flash was pointed straight up. I know these things because I was there when he shot them. When you're outside the flash should be used as a fill flash and pointed straight at the subject when it is on the camera. Another thing that could have been done is to get an inexpensive set of radio triggers, put one on your speedlight, get a friend to hold the light where you tell him to.
Try this next time you're outside. Get someone to model for you and another friend to help you out with the flash if you can. If you can't find someone to model for you get something about the size of a person, and try to get your flash off camera.
Setup and take a properly exposed shot without the flash, making sure your meter is zeroed out for a proper exposure: this will be your starting point.
Setup the flash and take another shot properly exposed for the flash. Your subject should look about the same in each shot.
Adjust the exposures so that the aperture settings in both are equal. For example if the ambient exposure is 1/250th at f/5.6 and the flash exposure is f/8, then you want to make your aperture at f/8 and your shutterspeed 1/125th and take a shot. Note that if your subject is in the same light as the background it may appear washed out. This is because you are, in essence, doubling the amount of light hitting the subject so you need to stop down your aperture to f/11 and set your shutterspeed to 1/60th because the flash exposure is controlled by the aperture.
You now have what I like to call the reference exposure. Now take a few bracketed shots, one with a one stop faster shutter speed and one with a one stop slower shutter speed. This should have no effect on your subject or model but should have an effect on the background. You probably won't notice it so much on the camera display but when you look at it on the computer you should notice the change. Take a few shots with even more drastic changes in the shutter speed and see what you get. Just remember to keep in mind the sync speed of your camera. This should be listed in your camera manual. If you're having trouble getting the shutter speeds you need change your ISO. Just remember if you change one setting you'll need to know how it affects your image so you can adjust your other settings accordingly.
Wednesday, May 8, 2013
Confidence
I hear some of my photographer friends talk about not having confidence from time to time. They question their knowledge and abilities. They are unsure of how to get the lighting effects that they want or a certain look or feel in a photograph. What I've observed most of the time in this situation is a lack of understanding of their equipment and how light works.
Most of the confidence problems can be solved by one simple thing... Practice! I'm constantly practicing shots. In the age of digital cameras it has become rather inexpensive to practice your photography. Grab your camera and a lens and go out and shoot. Shoot at different times of the day, different weather conditions, different places. I've gotten great shots at 12:00pm on a sunny cloudless day because I know what the light is doing at that time of the day and through years of practice shooting I know exactly what I'm going to get. You'll hear a lot of photographers say: That is the worst time to shoot, the light is too harsh. A lot of them will say never shoot people in that kind of light. They also say look for shade to shoot people in, Never shoot people in direct sunlight. That's crap. I do it all the time with excellent results, However I also shoot in the shade as well. I feel equally comfortable shooting in all kinds of conditions because I practice.
Another thing that can build your confidence level is knowing your camera. Explore your camera settings. Read the manual that came with your camera. Let me say that again, READ THE MANUAL. You will find all kinds of information about your camera. I learned about rear sync by reading my camera manual, I then went out and practiced with it to see what I would get. I now have confidence with it and I use it at weddings a lot to generate a sense of motion in my images.
Once you know how your equipment works, you've got your lighting down go out and experiment. I'm constantly experimenting with my equipment. I'm always trying new things with it, new lighting setups, different camera settings. Always experiment. I sometimes take the same shot over and over again with different settings just to compare the differences.
Don't be afraid to screw up. I do it all the time. I learn more about photography when I make a mistake than when everything is going my way. One nice thing about digital cameras is you can screw up and immediately see the results on the back of your camera. Sometimes a screw up turns out great and it looks like you knew what you were doing (make sure you note all camera settings and lighting conditions in case you have to replicate the "effect") so don't be afraid.
Photography is not easy, anyone that says it is, is not a photographer. It takes hard work and dedication. On the other hand it's not calculus based physics either. It takes time and practice to become good at photography. Take the time and the confidence will come.
Saturday, May 4, 2013
Jonathan and Anna's Wedding
Well it's finally over. We just got home and it was quite a day. I had my wife and second shooter with with the bride and bridesmaids. I covered the groom and groomsmen. The ceremony was great, it wasn't too long and everyone had a great time. The biggest problem that we had was when we got to the place for the bridal shoot we had to contend with a mob of prom people. So we found a quit out of the way place for the bridal shoot then headed over to the reception. Needless to say it was very busy. I'll be posting more on the wedding as soon as I get some rest.
Jonathan and Anna's Wedding Rehearsal
Shot the wedding rehearsal last night and I'm glad I went. I was able to get a couple of shots that I'm sure the bride and groom will love to look back on. This is not so much a formal type of shoot but more like a snap shot / candid opportunity. I also look at it as an opportunity to get a feel for the lighting in the church. I generally shoot this on Auto White Balance and I usually have my ISO cranked up a little. I generally do not shoot with a flash at ceremonies because they usually are not allowed. With the newer digital cameras and their higher end ISO's it's not that bad.
Another reason I'm glad I went was because I was able to meet with the minister who will be officiating the wedding. It is really important to meet with the minister before the ceremony to get the ground rules. The sooner the better, so you know what equipment to have on hand to get those special moments.
The minister will tell you what he will and will not allow during the ceremony. You need to keep your opinions and ideas to yourself at this meeting. These guys are the ones in charge. Listen to what they are saying, make notes if you have to.
I like to get these rules before they have the rehearsal so I can practice getting shots during the rehearsal following the rules. If you're shooting one of your wedding packages that does not include the rehearsal or if the minister is not at the rehearsal, you need to meet with him / her as early as possible on the day of the wedding to get their rules. Everyone of them is different in what they will allow, so you have to be prepared for anything.
Wednesday, May 1, 2013
May Quick Tip: Initial Camera Setup
I have decided to create a monthly quick tip. Just a little something each month that may help you in your photographic endeavors. These tips are the result of problems that I or one of my friends have run into and how we solved the problem.
This month I'm going to cover setting up your camera before you go out with it.
My friend messaged me this morning about missing a shot because she didn't have her camera ready. She had it with her but was unable to get the shot because she was fumbling with a lens, or focusing or some other thing that messed her up. I myself have missed shots because of the very same thing. I have my camera with me, it just isn't set up for the lighting and area that I'm shooting in.
One thing that I find that helps alleviate this problem is setting up my camera before I even go out the door. I take into consideration where I'm going what the light is like, weather I'll be using flash or not, how big or small the area is and what I'll be shooting. From these factors I select an initial ISO and shutter speed. Once these two are set it's real easy to set aperture and make any fine adjustments to get that shot.
Busy Two Weeks
Well it's been a busy two weeks of shooting and editing. Fortunately I'm done shooting the spring athletics. I have a school/farm photo shoot scheduled for the 14th but the big one that has been occupying most of my time is the wedding this weekend.
I've been making sure that I have batteries and electrical cords for the lights. I'm picking up a backup battery for the D3S. I have all my stands together, and we purchased a new bag for carrying lenses and other small stuff for the assistant. My wife who is also my assistant made me label all of my lens caps with the type of lens so all she has to do is reach in and grab the right one. Hopefully this will speed things up. We also purchased a reflector stand. Hoping this will help with the portraits in the church and free up my assistants to hold other things.
We're going to try and do family portraits at the reception which is something new for us, we'll have to see how it goes. It's going to be a very busy day.
Tuesday, April 30, 2013
Wedding and Rehearsal
Tuesday, and I finally recovered from shooting the wedding, which is a good thing because I have another one that I'm shooting this weekend. I'll be lead photographer at the next one.
I always try to process a few images from shoots where I am second shooter for myself and with all of the fun stuff I was doing I decided on three that I really like.
The first one was the first dance. It was shot at 1/50th of a second at f/4.5 with an ISO of 800. The lens I used was my old 28-105mm at 78mm. I used a Sunpak 544 flash pointed straight up at the ceiling. It was set at 1/4 power which was plenty. I had my camera set to rear sync for the flash so it fired at the end of the exposure.
I really like how the color turned out on this. I also like the slight motion in the lights in the background.
The second one I processed was a little girl twirling on the dance floor with a streamer in her hand. I shot this one at 1/60th of a second at f/4.2, ISO 800 with the same lens. I tried a couple of things with this one, I blurred the background in Photoshop which is this first one. I then created another layer, applied radial blur and set it to overlay. My wife likes the first one but I like the darker second one more.
The last one was one where I set the shutter at 1/2 a second, stopped down to f/10 to compensate set my focal length at 35mm. Keeping the rear sync on I raised the camera above my head and pressed the shutter. This is what I got.
You never know what you're going to get when you do something like this but if you do it a couple of times you might get lucky and get something really special.
I always try to process a few images from shoots where I am second shooter for myself and with all of the fun stuff I was doing I decided on three that I really like.
The first one was the first dance. It was shot at 1/50th of a second at f/4.5 with an ISO of 800. The lens I used was my old 28-105mm at 78mm. I used a Sunpak 544 flash pointed straight up at the ceiling. It was set at 1/4 power which was plenty. I had my camera set to rear sync for the flash so it fired at the end of the exposure.
 | |
| First Dance |
The second one I processed was a little girl twirling on the dance floor with a streamer in her hand. I shot this one at 1/60th of a second at f/4.2, ISO 800 with the same lens. I tried a couple of things with this one, I blurred the background in Photoshop which is this first one. I then created another layer, applied radial blur and set it to overlay. My wife likes the first one but I like the darker second one more.
 | |
| First Edit |
 | |
| Second Edit |
The last one was one where I set the shutter at 1/2 a second, stopped down to f/10 to compensate set my focal length at 35mm. Keeping the rear sync on I raised the camera above my head and pressed the shutter. This is what I got.
 | |
| Everyone Having Fun |
Saturday, April 27, 2013
Wedding Rehearsal and Wedding
I was a second shooter at a wedding rehearsal and wedding over the last two days and am very tired. I was glad to do it though because I have a wedding next week that I am first shooter and needed to refresh the brain on a lot of things. I can't believe how quickly I was able to jump back into it. It took about ten minutes of shooting at the church and the reception hall before I had my camera's settings dialed in at both places.
I shot at the ceremony using an ISO around 8000 with no flash. those pictures turned out just a bit grainy but should be fine with a little processing. At the the reception I was using a Sunpak 544 pointed straight up into the ceiling between 1/2 to 1/16 power. My camera was set with ISO 800, a shutter speed of around 1/100 but it varied which was dependent on the effect I was going for. As always I set my camera to rear curtain sync so the flash was firing at the end of the exposure. You can really get some cool affects by dragging the shutter but you need to make sure that you compensate with the shutter speed.
I'll be posting more about the wedding shoot but I'm really tired right now and have to get to bed because I have a scouting trip tomorrow to look for places for a wedding shoot that I have next weekend.
Thursday, April 25, 2013
Engagement Shoot for Jonathan and Anna
Well the engagement pictures are almost all done, I have two or three left to edit. All in all the editing went very well other than hair fly-aways because of the wind another problem I had was cat hair on Jonathan's shirt. Need to make sure you bring a lint brush or roller with you and also make sure you inspect their clothing before you start shooting. Two minutes on the shoot can save you hours in post.
You can see all of the finished photos at:
http://www.robertgainorphotography.com/jonathanannaengagement
You can see all of the finished photos at:
http://www.robertgainorphotography.com/jonathanannaengagement
Monday, April 22, 2013
Athletic Shoots
Once again I shot a softball game and a baseball game at the same time. This time I was better prepared and was able to get onto the field for a little bit of shooting. It wasn't as windy or cloudy as the last time so I only had harsh sun shine to deal with. It didn't go too bad at all though and I was able to get some great shots.
Seagate Drives
I've been having trouble with Photoshop saving files to one of my external drives. Turns out There have been several problems with Seagate drives on macs using Seagate's software. So I copied all of my files from said drive to my mac, uninstalled all of the Seagate software, partitioned the drive, reformatted using fat instead of ntfs, and copied all files back to the drive. Drive seems to be operating fine now. I guess macs just don't want to use that ntfs file system at all.
Sunday, April 21, 2013

Editing...
Settling in for a long day of editing and processing. I have to get the engagement photos from yesterday done and make some headway on the athletic pictures that I've shot. I have track, tennis, softball and baseball to edit. This is one of the parts that I'm not that fond of doing. Don't get me wrong I love doing it on my images but working on clients photos it's a necessary evil and I do my best to devote just as much attention to their photos as I do for my own work. I'll probably be at this all day. Just need to make sure that I get up and away from it every now and then.
I've looked over the engagement images and have culled it down from 238 to around 80 images. From here I'll get that down to around 10 to 15 as I look at them more closely while I pick the ones to edit.
I've looked over the engagement images and have culled it down from 238 to around 80 images. From here I'll get that down to around 10 to 15 as I look at them more closely while I pick the ones to edit.
Saturday, April 20, 2013
Engagement Shoot
Did an engagement shoot today at Cox Arboretum in Dayton between 4:30 and 6:00 pm. It was windy, partly cloudy, and cold. Lighting was a bit tough to handle because the sun kept going in and out of the clouds. I had to do some bracketing to make sure that I got some decent exposures. I had to go from using a Nikon SB24 in a Westscott Apollo Softbox to using ambient light. I would have liked to use an Alien Bees B400 but it was just way to windy. I'll be posting the results on my website in a couple of days.
Friday, April 19, 2013
Athletic Shoots
Shot a softball game at the same time as a baseball game yesterday. It wasn't to bad since both fields were side by side. One problem I ran into was the fence. I had to position the camera so that the lens was between the wire of the fencing. I took a few from up in the stands but the stands weren't high enough for me to see over the top of them. I'll have to rethink some things the next time out.
Tuesday, April 16, 2013
Photo Processing
I added a new page on processing. This is my basic processing routine. I usually start with these basic steps and move on from there. More often than not these steps are all an image needs. You can access the page by clicking on the link to the right or by clicking here
Photo Processing
Photo Processing
Monday, April 15, 2013


Subscribe to:
Posts (Atom)